VS Code Extension (Beta)
The VS Code extension, available in beta, lets you see Claude’s changes in real-time through a native graphical interface integrated directly into your IDE. The VS Code extension makes it easier to access and interact with Claude Code for users who prefer a visual interface over the terminal.Features
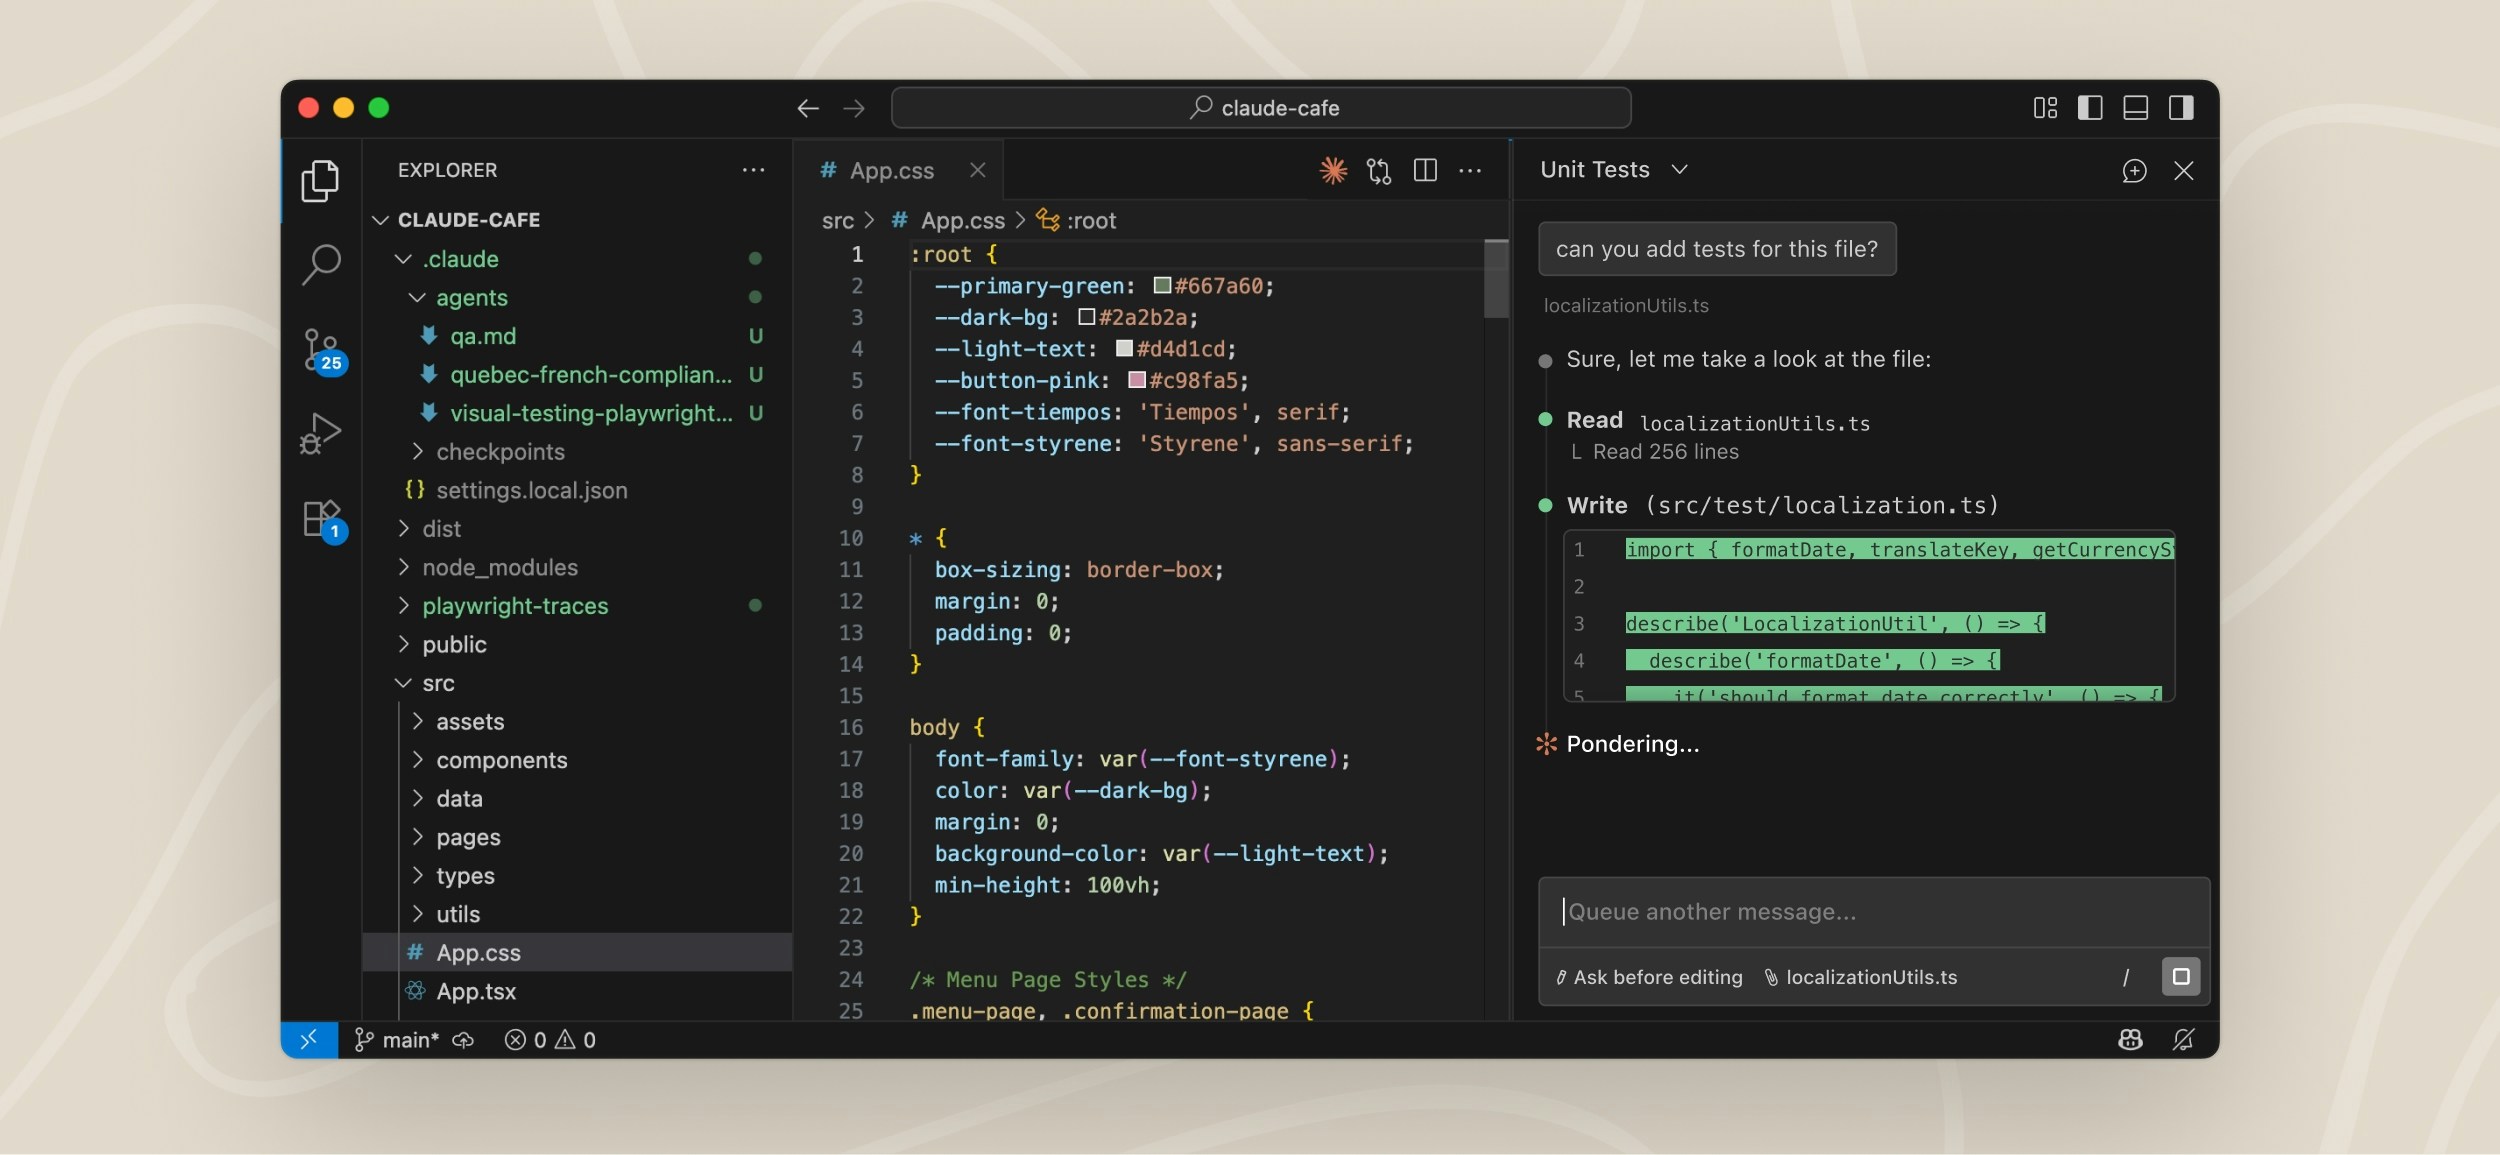
The VS Code extension provides:- Native IDE experience: Dedicated Claude Code sidebar panel accessed via the Spark icon
- Plan mode with editing: Review and edit Claude’s plans before accepting them
- Auto-accept edits mode: Automatically apply Claude’s changes as they’re made
- File management: @-mention files or attach files and images using the system file picker
- MCP server usage: Use Model Context Protocol servers configured through the CLI
- Conversation history: Easy access to past conversations
- Multiple sessions: Run multiple Claude Code sessions simultaneously
- Keyboard shortcuts: Support for most shortcuts from the CLI
- Slash commands: Access most CLI slash commands directly in the extension
Requirements
- VS Code 1.98.0 or higher
Installation
Download and install the extension from the Visual Studio Code Extension Marketplace.How It Works
Once installed, you can start using Claude Code through the VS Code interface:- Click the Spark icon in your editor’s sidebar to open the Claude Code panel
- Prompt Claude Code in the same way you would in the terminal
- Watch as Claude analyzes your code and suggests changes
- Review and accept edits directly in the interface
- Tip: Drag the sidebar wider to see inline diffs, then click on them to expand for full details
Using Third-Party Providers (Vertex and Bedrock)
The VS Code extension supports using Claude Code with third-party providers like Amazon Bedrock and Google Vertex AI. When configured with these providers, the extension will not prompt for login. To use third-party providers, configure environment variables in the VS Code extension settings:- Open VS Code settings
- Search for “Claude Code: Environment Variables”
- Add the required environment variables
Environment Variables
| Variable | Description | Required | Example |
|---|---|---|---|
CLAUDE_CODE_USE_BEDROCK | Enable Amazon Bedrock integration | Required for Bedrock | "1" or "true" |
CLAUDE_CODE_USE_VERTEX | Enable Google Vertex AI integration | Required for Vertex AI | "1" or "true" |
ANTHROPIC_API_KEY | API key for third-party access | Required | "your-api-key" |
AWS_REGION | AWS region for Bedrock | "us-east-2" | |
AWS_PROFILE | AWS profile for Bedrock authentication | "your-profile" | |
CLOUD_ML_REGION | Region for Vertex AI | "global" or "us-east5" | |
ANTHROPIC_VERTEX_PROJECT_ID | GCP project ID for Vertex AI | "your-project-id" | |
ANTHROPIC_MODEL | Override primary model | Override model ID | "us.anthropic.claude-3-7-sonnet-20250219-v1:0" |
ANTHROPIC_SMALL_FAST_MODEL | Override small/fast model | Optional | "us.anthropic.claude-3-5-haiku-20241022-v1:0" |
CLAUDE_CODE_SKIP_AUTH_LOGIN | Disable all prompts to login | Optional | "1" or "true" |
Not Yet Implemented
The following features are not yet available in the VS Code extension:- Full MCP server configuration: You need to configure MCP servers through the CLI first, then the extension will use them
- Subagents configuration: Configure subagents through the CLI to use them in VS Code
- Checkpoints: Save and restore conversation state at specific points
- Advanced shortcuts:
#shortcut to add to memory!shortcut to run bash commands directly
- Tab completion: File path completion with tab key
Security Considerations
When Claude Code runs in VS Code with auto-edit permissions enabled, it may be able to modify IDE configuration files that can be automatically executed by your IDE. This may increase the risk of running Claude Code in auto-edit mode and allow bypassing Claude Code’s permission prompts for bash execution. When running in VS Code, consider:- Enabling VS Code Restricted Mode for untrusted workspaces
- Using manual approval mode for edits
- Taking extra care to ensure Claude is only used with trusted prompts
Legacy CLI Integration
The first VS Code integration that we released allows Claude Code running in the terminal to interact with your IDE. It provides selection context sharing (current selection/tab is automatically shared with Claude Code), diff viewing in the IDE instead of terminal, file reference shortcuts (Cmd+Option+K on Mac or Alt+Ctrl+K on Windows/Linux to insert file references like @File#L1-99), and automatic diagnostic sharing (lint and syntax errors).
The legacy integration auto-installs when you run claude from VS Code’s integrated terminal. Simply run claude from the terminal and all features activate. For external terminals, use the /ide command to connect Claude Code to your VS Code instance. To configure, run claude, enter /config, and set the diff tool to auto for automatic IDE detection.
Both the extension and CLI integration work with Visual Studio Code, Cursor, Windsurf, and VSCodium.
Troubleshooting
Extension Not Installing
- Ensure you have a compatible version of VS Code (1.85.0 or later)
- Check that VS Code has permission to install extensions
- Try installing directly from the marketplace website
Legacy Integration Not Working
- Ensure you’re running Claude Code from VS Code’s integrated terminal
- Ensure the CLI for your IDE variant is installed:
- VS Code:
codecommand should be available - Cursor:
cursorcommand should be available - Windsurf:
windsurfcommand should be available - VSCodium:
codiumcommand should be available
- VS Code:
- If the command isn’t installed:
- Open command palette with
Cmd+Shift+P(Mac) orCtrl+Shift+P(Windows/Linux) - Search for “Shell Command: Install ‘code’ command in PATH” (or equivalent for your IDE)
- Open command palette with